How To Install Sliders
The acrylic slider base needs to be separated from the the part of the slider that will be screwed to the shelf (rear piece).
1. Extend the slider all the way.
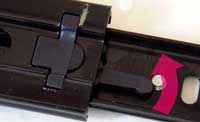
2. On the underside of the Slider, lift the little lever and rotate up. This releases the slider base from the rear piece.
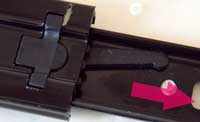 3. Pull the acrylic slider base out and separate from the rear piece.
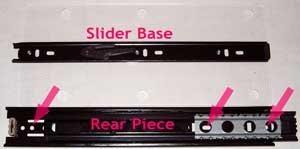
4. Removing the slider base from the rear piece provides access to the screw holes (arrows) required for mounting the unit.
5. Align DiscSox Slider rear piece with front edge of shelf.
6. Mark 3 locations for inserting screws using the slider rear piece as a template.
7. Attach the rear piece to the shelf with the 3 screws provided.
8. Insert slider base back into rear piece.
Note: Depending on the shelf material, pre-drilling the screw holes may be required.
9. The acrylic slider base is protected by a paper cover to prevent being scratched. 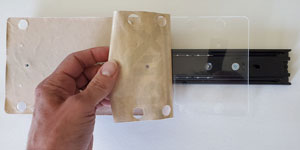 Once you are done with setting up the slider, peel off the paper cover.
10. Align the Snap-Fit tray on the slider such that the bump-ons (polyurethane feet) fit into the holes of the slider base. Note that not all bump-ons on the tray will fit into the slider base holes. Only add bump-ons to locations that line up with the holes in the slider base.
For use with Metal Trays, line up the metal tray with the slider base and push Christmas tree pins through the metal tray base into the small holes of the slider base.